
Nobuko Stitch
Parallel diagonal stitches that alternate over one and over three intersections, worked in horizontal rows to make a small woven texture.
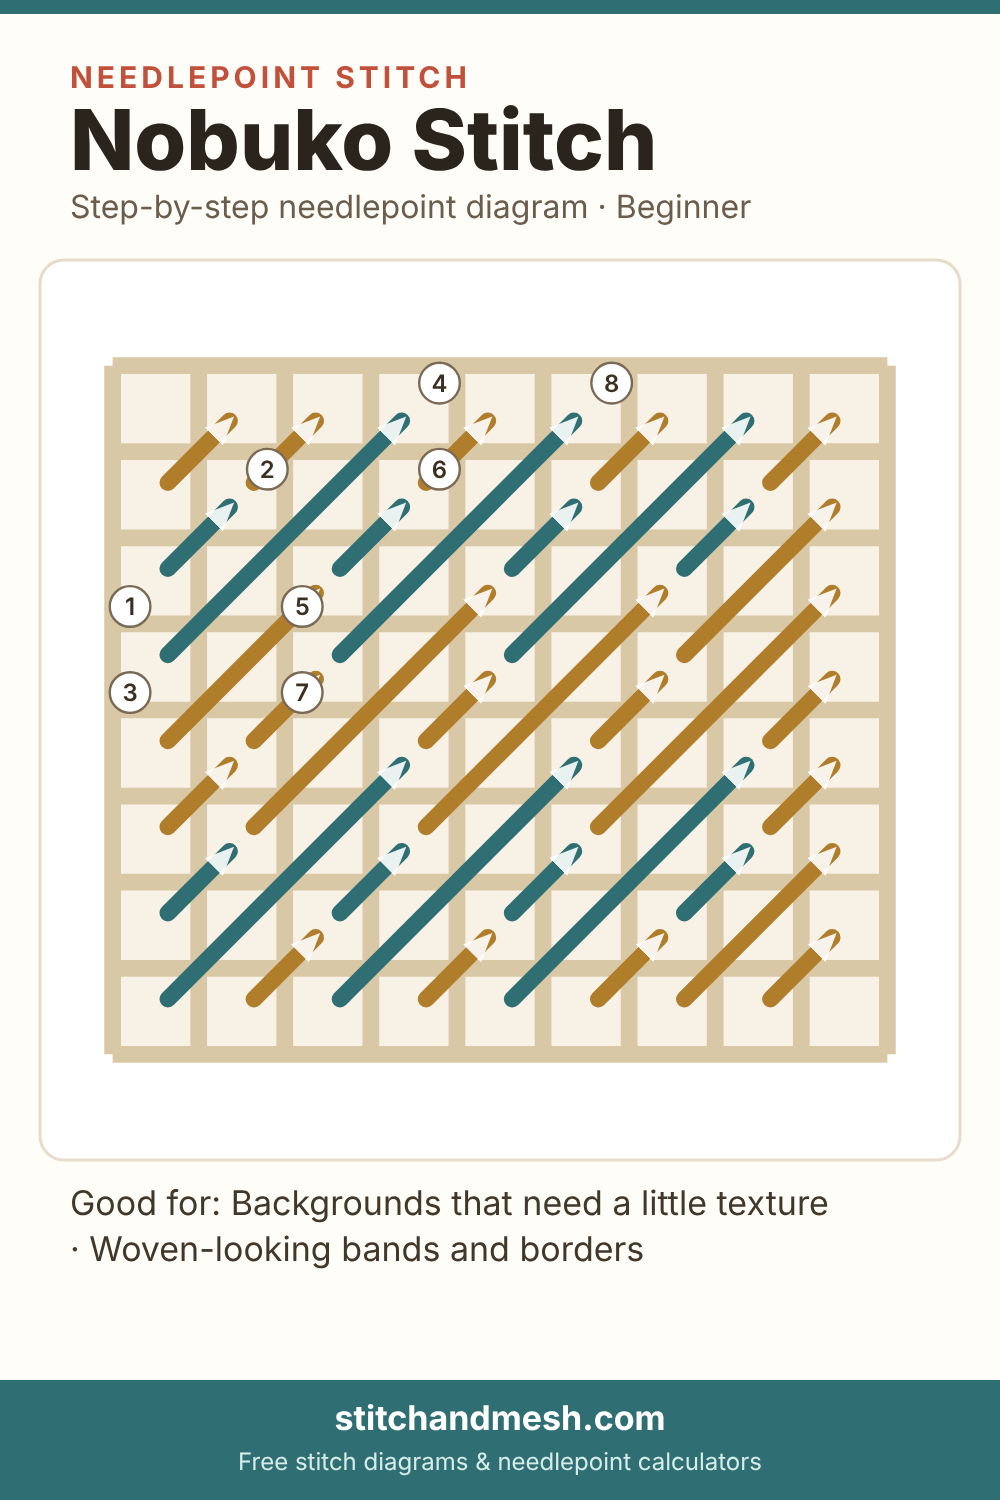
How to work Nobuko stitch
- Stitches 1–7. Working left to right, alternate a short stitch over one intersection with a long stitch over three. Every stitch slants the same way, and the middle of each one sits on the same level, so the long stitches reach one hole above and one hole below the short ones.
- Up at 1 (lower left), down at 2 (upper right): diagonally over 1 intersection.
- Up at 3 (lower left), down at 4 (upper right): diagonally over 3 intersections.
- Up at 5 (lower left), down at 6 (upper right): diagonally over 1 intersection.
- Up at 7 (lower left), down at 8 (upper right): diagonally over 3 intersections.
- Stitches 8–14. Work the next row right to left, two holes lower. Put a long stitch under each short stitch of the row above and a short stitch under each long one, so the rows lock together.
- Stitches 15–21. Repeat, swapping long and short every row.
- Stitches 22–35. Fill the gaps at the edges of the area with shorter stitches on the same slant (compensating stitches).
Good for
- Backgrounds that need a little texture
- Woven-looking bands and borders
- Foliage, baskets and tweedy fabric
Thread notes
It covers like tent on the diagonal, so the thread you use for basketweave usually works. A matte thread reads as a fine weave; a shiny one shows the long stitches more.