
Binding Stitch
A finishing stitch that wraps over a folded canvas edge in a back-and-forward order, covering it with a firm, braided ridge.
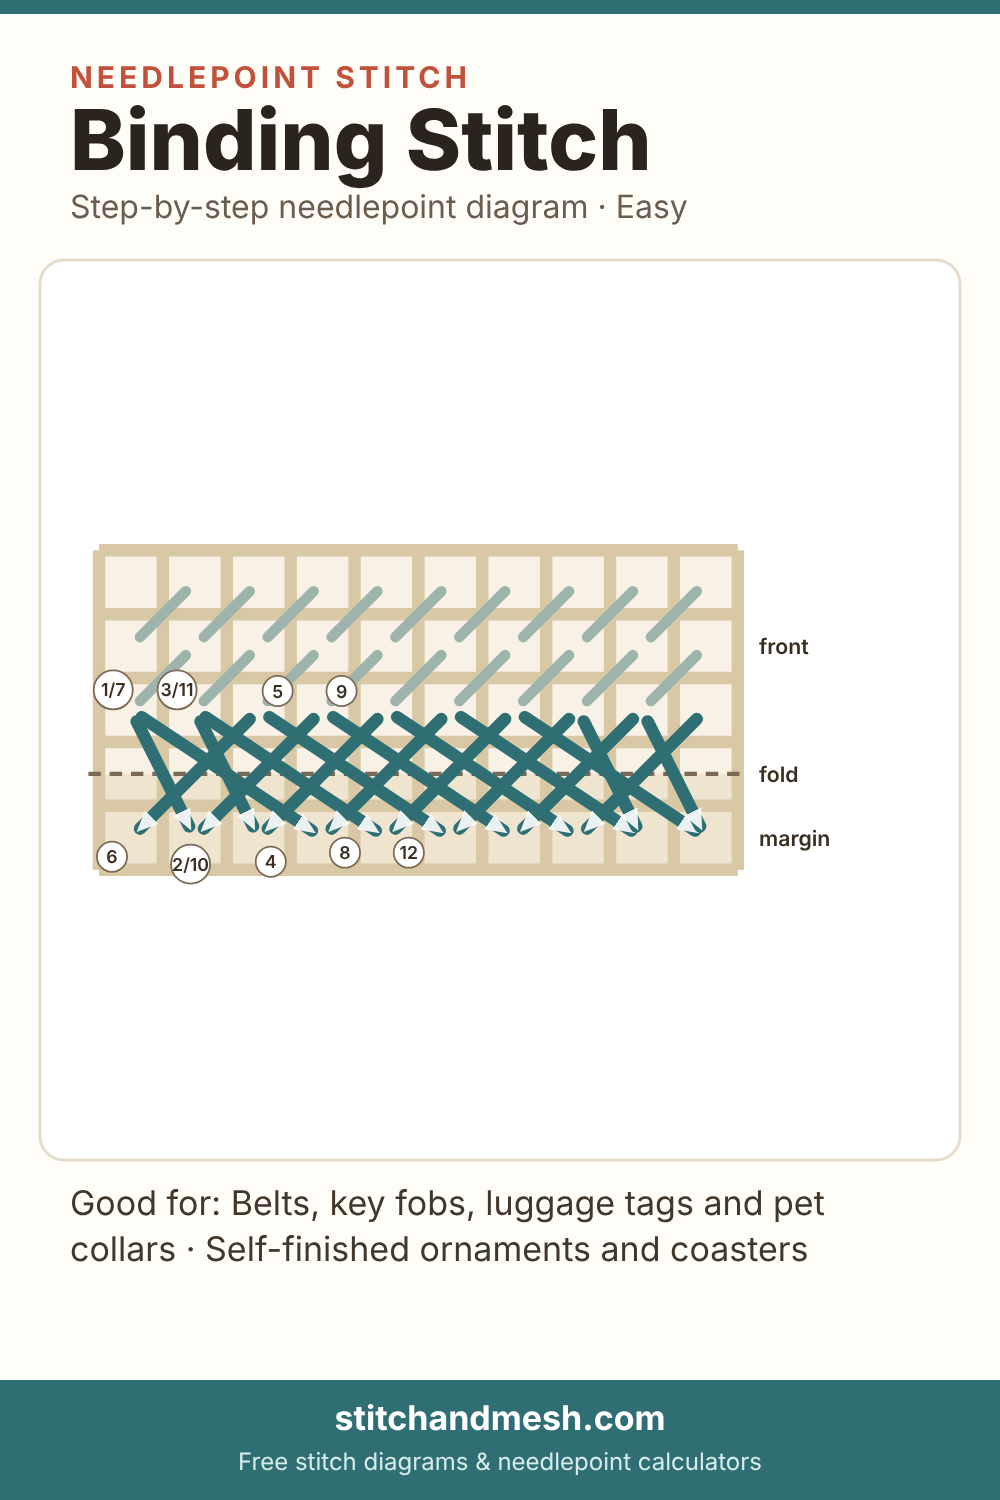
How to work binding stitch
- Stitch 1. Fold the margin back along the first empty row of holes, so each margin hole sits behind a hole in the last stitched row. Bring the thread out in the last stitched row and make the first wrap over the fold into the next hole along.
- Out at 1 in the last stitched row, wrap over the fold, and go in at 2 in the margin, 1 hole forward, straight through both layers.
- Stitch 2. Push the needle straight through both layers, the margin and the last stitched row together, without splitting the stitches. Every wrap goes through both layers this way and covers the two threads of the fold. Wrap into the next hole along: that's two wraps.
- Out at 3 in the last stitched row, wrap over the fold, and go in at 4 in the margin, 1 hole forward, straight through both layers.
- Stitches 3–4. Go back two holes and wrap, then go forward three holes to the first empty one and wrap.
- Out at 5 in the last stitched row, wrap over the fold, and go in at 6 in the margin, 2 holes back, straight through both layers.
- Out at 7 in the last stitched row, wrap over the fold, and go in at 8 in the margin, 3 holes forward, straight through both layers.
- Stitches 5–16. Repeat back two, forward three to the end of the edge. Each hole ends up with two wraps, one from a long forward wrap and one from a short backward wrap, and the crossings make the braid.
- Out at 9 in the last stitched row, wrap over the fold, and go in at 10 in the margin, 2 holes back, straight through both layers.
- Out at 11 in the last stitched row, wrap over the fold, and go in at 12 in the margin, 3 holes forward, straight through both layers.
- Stitches 17–19. Finish by going back two holes once more, then wrapping into each of the last two holes, so the last hole is covered like the others. Run the thread under the wraps on the back.
Good for
- Belts, key fobs, luggage tags and pet collars
- Self-finished ornaments and coasters
- Joining two canvases along a shared edge
Thread notes
Use a smooth, strong thread that covers the fold without bulk, often the background thread or a cord in the trim colour. Each hole takes two wraps, so on 18 mesh a fine pearl cotton is usually enough, and on 13 mesh a heavier one. Re-thread before the strand wears thin.