
Herringbone Stitch
Crossing diagonal stitches over two intersections, each one starting a hole back from the last, so every row forms a woven chevron.
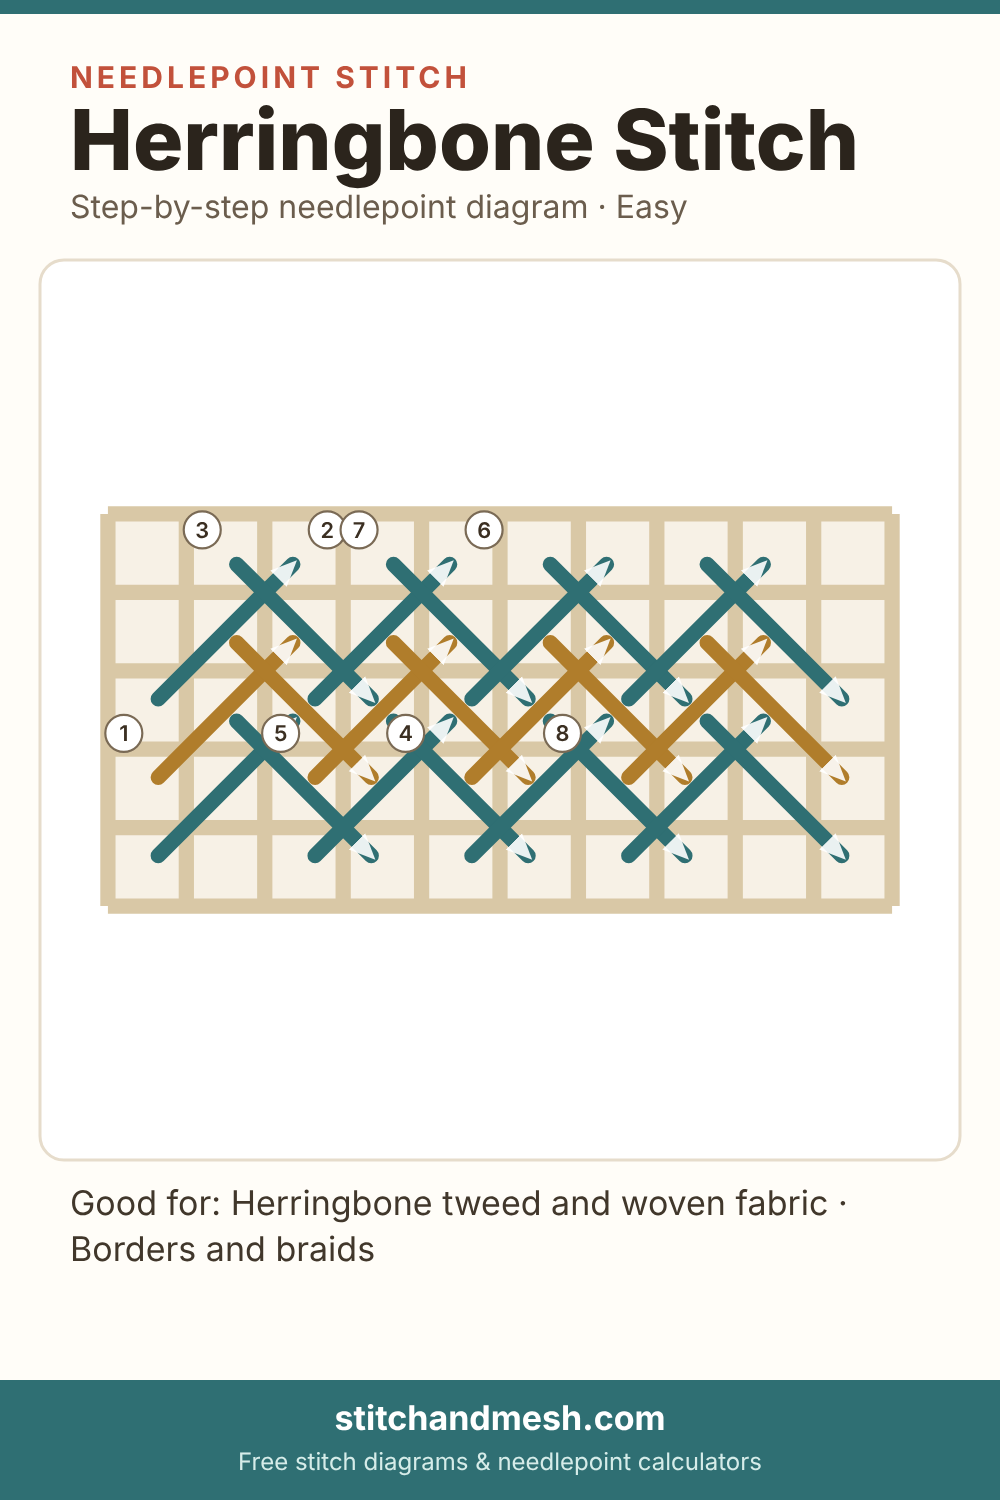
How to work herringbone stitch
- Stitches 1–8. Come up on the bottom line and cross up and to the right over two intersections. Come up one hole back to the left on the top line and cross down to the right over two intersections. Keep going: each stitch crosses the one before it.
- Up at 1 (lower left), down at 2 (upper right): diagonally over 2 intersections.
- Up at 3 (upper left), down at 4 (lower right): diagonally over 2 intersections.
- Up at 5 (lower left), down at 6 (upper right): diagonally over 2 intersections.
- Up at 7 (upper left), down at 8 (lower right): diagonally over 2 intersections.
- Stitches 9–16. Start the next row at the left edge again, one thread lower than the row above. Its stitches overlap the bottom half of the first row, so no bare canvas shows between the rows.
- Stitches 17–24. Work every row the same way, from the left, one thread below the last. Rows are always worked in the same direction.
Good for
- Herringbone tweed and woven fabric
- Borders and braids
- Backgrounds with a slight sheen of texture
Thread notes
The crossings double the thread at the top and bottom of each row, so a thread a little finer than for tent keeps it flat. Stitch on stretcher bars and keep the tension even, or the canvas pulls sideways.