
Rhodes Stitch
A raised square built from stitches that all cross the centre, each one moved a hole along the edge so the unit turns like a wheel.
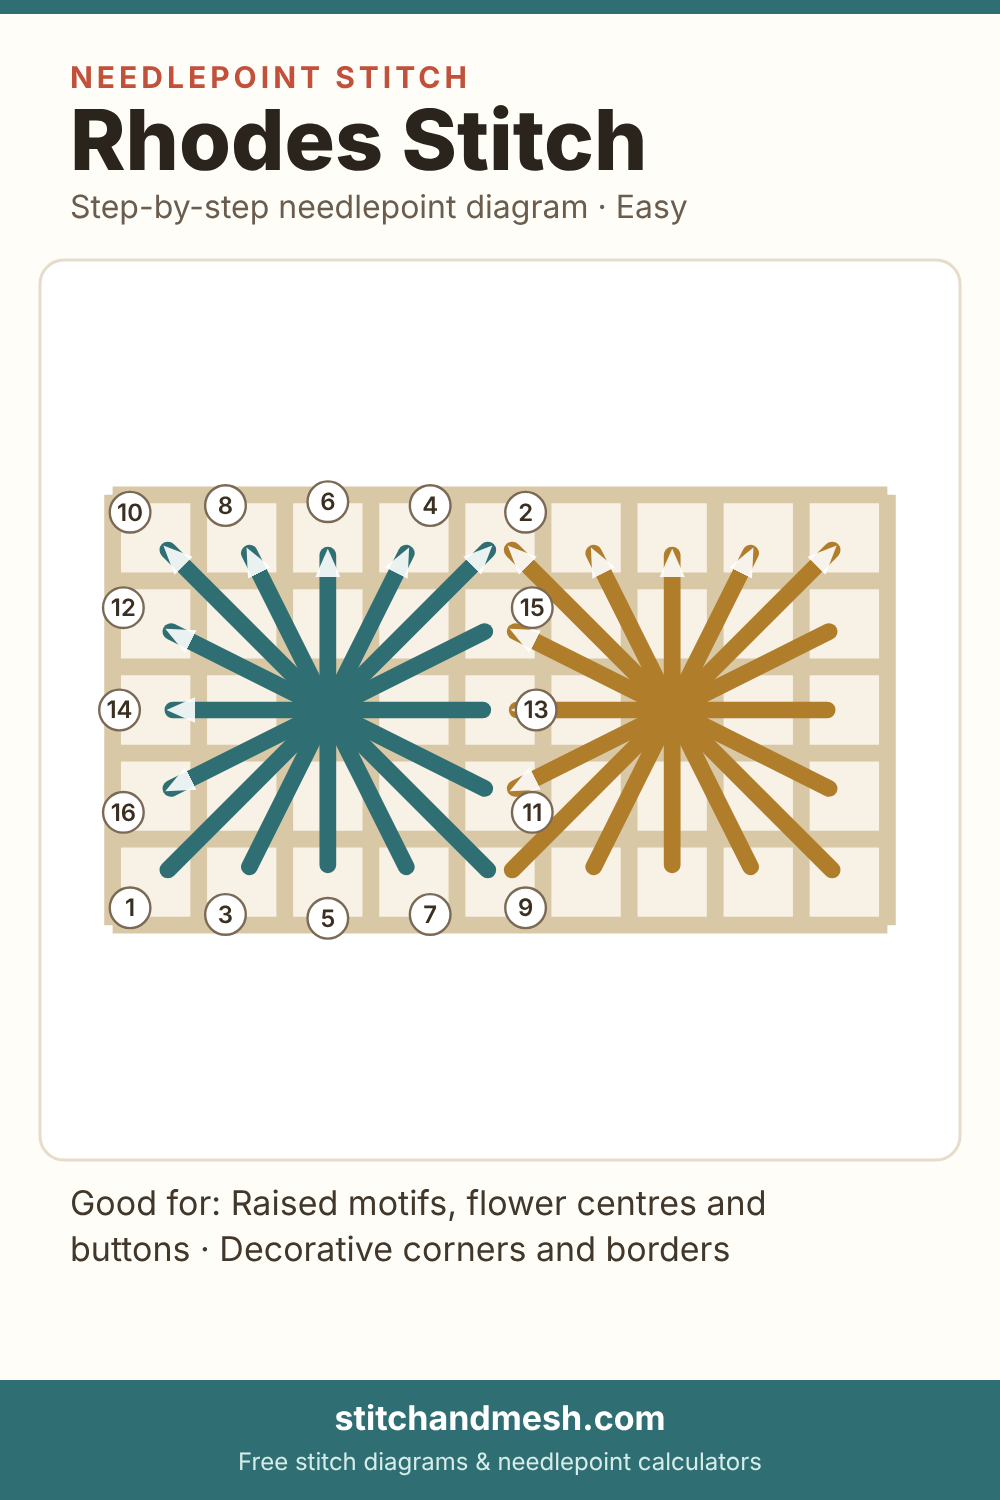
How to work Rhodes stitch
- Stitch 1. Start in the lower left corner of a square four threads by four, and cross to the upper right corner.
- Up at 1 (lower left), down at 2 (upper right): diagonally over 4 intersections.
- Stitches 2–8. Move one hole to the right along the bottom and one hole to the left along the top for each new stitch, so every stitch passes through the centre. When you reach the corners, carry on with the start moving up the right side and the end moving down the left side, until every edge hole is used.
- Up at 3 (lower left), down at 4 (upper right): diagonally over 2 × 4 threads.
- Up at 5 (bottom), down at 6 (top): upright over 4 threads.
- Up at 7 (lower right), down at 8 (upper left): diagonally over 2 × 4 threads.
- Up at 9 (lower right), down at 10 (upper left): diagonally over 4 intersections.
- Up at 11 (lower right), down at 12 (upper left): diagonally over 4 × 2 threads.
- Up at 13 (right), down at 14 (left): across over 4 threads.
- Up at 15 (upper right), down at 16 (lower left): diagonally over 4 × 2 threads.
- Stitches 9–16. Work the next square the same way, turning in the same direction. Neighbouring squares share the holes along their edges.
Good for
- Raised motifs, flower centres and buttons
- Decorative corners and borders
- Snowballs and other round, padded shapes
Thread notes
Every stitch piles onto the centre, so the unit is thick. A thread one size finer than your tent thread keeps the centre from crowding, and a shiny thread shows the turning pattern best. Squares over 6 or 8 threads are worked the same way.